
Install Sonia System
Overview
This guide shows how to connect your Sonia system and prepare it for use with RoomHub.
Sonia is designed to install quickly, scale easily, and stay out of sight. Once connected, RoomHub handles discovery, control, and audio optimization.
Before You Begin
Before starting, confirm the basics:
Your network switch or PoE adapter supports PoE+ (or PoE++ for higher output)
Sonia C5 speakers are mounted in the ceiling
Sonia Amp, speakers, and microphones are powered off
This ensures a smooth first startup.
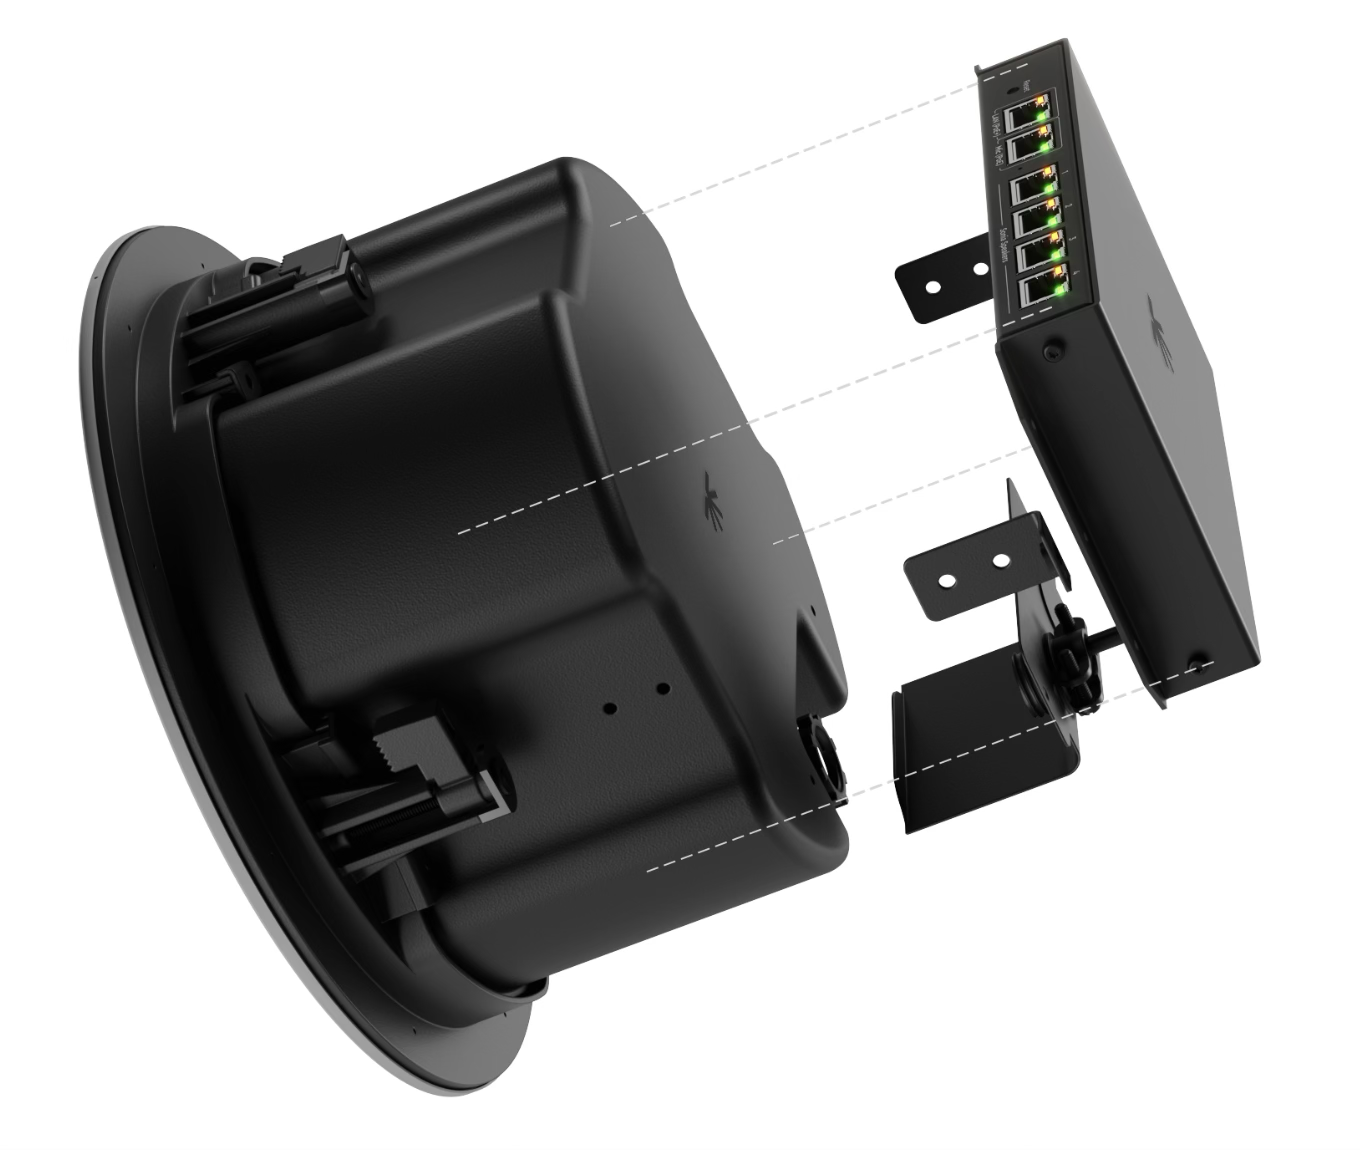
Attach the Sonia Amp
Mount the Sonia Amp directly onto one of the installed ceiling speakers.
The Amp:
Powers and controls the connected speakers
Acts as a small PoE-powered network switch
Provides connection points for microphones and other devices
No separate rack or enclosure is required.
Connect the Speakers
Connect the speakers using standard network cables.
Steps:
Connect up to 4 Sonia C5 speakers directly to the Sonia Amp
To expand coverage, daisy-chain one additional speaker from each connected speaker
This allows up to 8 speakers total per Amp
The distributed CatX design provides even coverage while keeping cabling simple and tidy.
Connect the Microphone
Connect your ceiling microphone to the Sonia Amp.
Steps:
Plug the microphone into the Mic port on the Amp
If the microphone requires more than one network cable, connect the additional cable directly to the network switch
Installation is complete
To complete the setup, continue with the Local Deployment guide.
In Summary
Sonia is designed to be simple.
Key points:
One Amp mounts directly to the ceiling speaker
Standard network cables for speakers and microphones
Clean, scalable distributed audio
Connect it once.
RoomHub takes it from there